
General
- Bit Depth Determines the Amplitude at which the Audio is Being Recorded
- the Higher the Bit Depth the Greater the Dynamic Range, i.e. the Resolution from the Quietest to the Loudest
- Remember that Bit Depth Affects How Quiet the Audio can Go Before it Disappears
- 16 Bit = Captures Everything Down to -96dBFS, i.e. Around 100dB of Dynamic Range
- 24 Bit = Captures Everything Down to -144dBFS, , i.e. Around 150dB of Dynamic Range
- 32 Bit = Captures Everything Down to -192dBFS, i.e. Around 200dB of Dynamic Range
- Below a 32-Bit File with 16 Bits On Each Side (Positive and Negative Side of the Waveform)
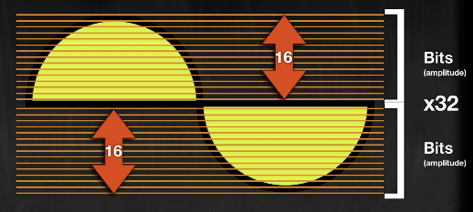
– in the Re-Sampling Process you have to Round Up or Round Down, i.e. Go Up to the Nearest Bit or Down to the Nearest Bit
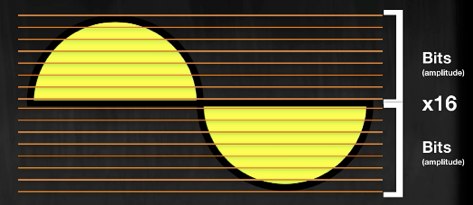
– that “Up/Down Rounding Process” Goes from “Bit to Bit” and Does Produce some “Errors” which you can Mask by Adding Random Low Level Noise in the Dither Process (i.e. Digital to Analog Conversion)
– “Dither” is Actually that “Very Low Level Noise” and Provides some Random Elements to Handle the Difference of Each one of the Steps between the 1st Bit, 2nd Bit etc.
– the “Dither Module” lets you Control the Quantisation Noise with Psycho Acoustic Methods that Allow to Distribute the Dithered Noise into Less Audible Ranges
– Several Modes Handle the Distribution of the Dither Noise, i.e. the “Noise Shaping”
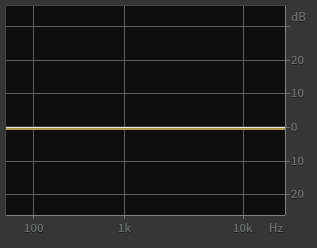
None = Noise gets Distributed Equally Across Spectrum
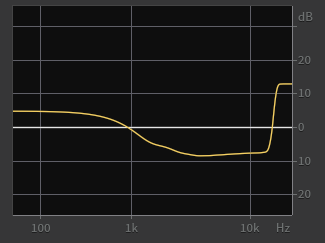
Medium = where Our Hearing is Very Sensitive a 10dB Attenuation Occurs (from 1000 Hz to 10000 Hz), but where you Take something away you Must Add so the Noise is Added from 0 Hz to 1000 Hz and Above 10000 Hz)
Alternate Resolution / Dither Images
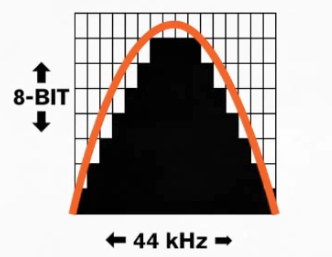
8 Bit at 44kHz
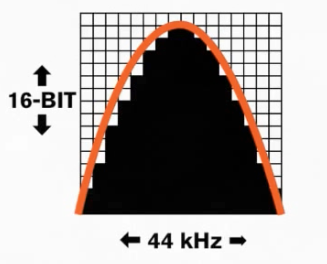
16 Bit at 44kHz
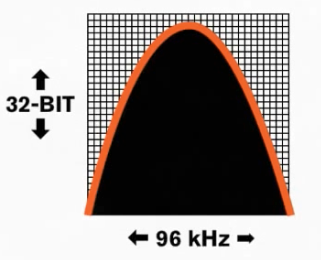
32 Bit at 96kHz
Dither Noise Fills Truncated Gaps
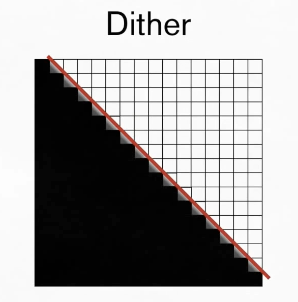
Visualise Image Dither
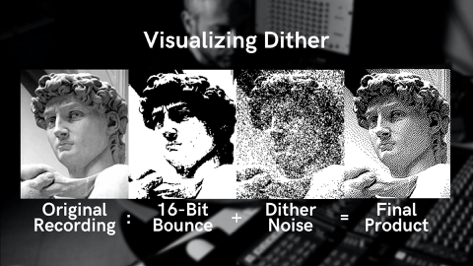
Test Dither
– See What Dithering from a 64 Bit Float Wave to a 16 Bit Wave in Real Time Does
- Generate a HQ 64 Bit Float Mono Wave at 440Hz and 96Hz SR
- Set it to Around -6dB
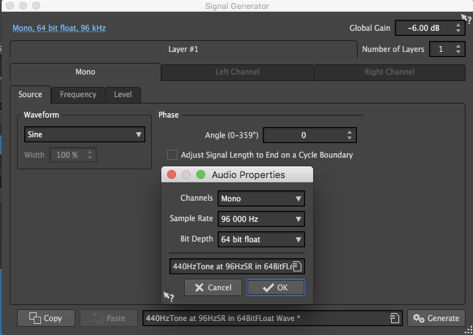
- here is the Original View of a 2kHz to 24kHz Wave with Original Noise Going Up to Approx -160dB
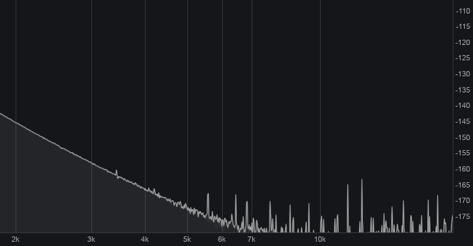
2) Insert Any Tool that Provides Dithering and Start to Change it to Lower than 64Bit
- i.e. Since Dither is Only Required when you Lower Bit Rate there will be Mostly Only Either 24 Bit or 16 Bit as a Possible Target
– e.g. Downsampling to 24Bit Brings Already Increased Noise Floor (but Still Very Low)
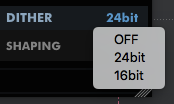
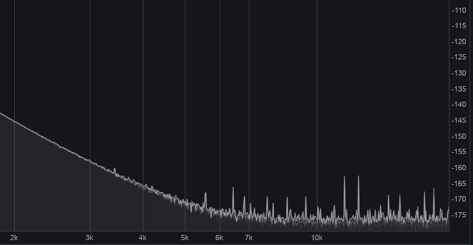
3) As soon as you Start to Downsample the Bit Rate you See the Noise Floor Increases
- e.g. Downsampling to 16Bit Adds a Quite Heavy Noise Floor
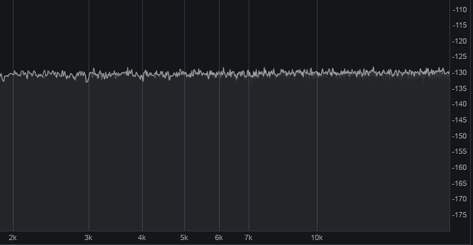
4) Now Use the Dither Tool Options to Lower the Noise Floor
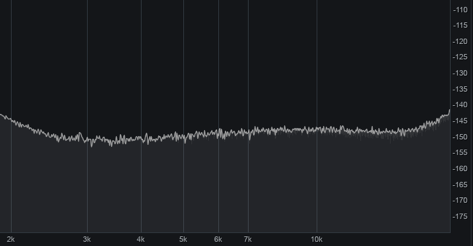
– i.e. Shape the Noise Floor of the Current Downsampling Process from 64Bit Float to 16Bit PCM
– e.g. Limitless with a Shaping of 100% (Default) to Optimize the Harmonic Distortion

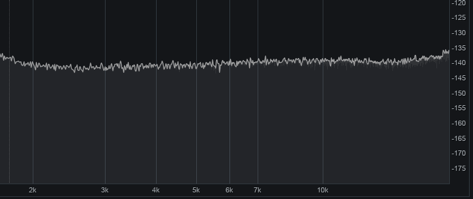
– e.g. Limitless with a Shaping of 200% (Max) to Optimize the Harmonic Distortion

5) In Theory, you Could Now Add a Random Noise to the Existing 440Hz and Mimic a Dither Tool which in the Essence AddsNoise to Flatten Out the Increasing Harmonic Distortion when you Lower Bit Rates (but Dither Tools have Better Tricks)
Truncation vs Dithering
– to Compare Truncation vs Dithering, Do Following:
1) At the Base, there is an Original PCM File at 24Bit in the Project
2) Reduce Track to -60dB Before Bouncing Out (with a Gain Plugin or Process Audio)
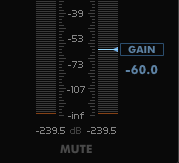
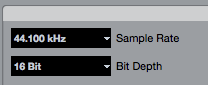
3) Bounce the Track Out at 16Bit Without Dithering (i.e. Truncate)
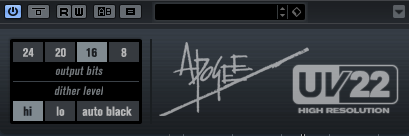
4) Add the Bounced Un-Dithered Track to the DAW and Bounce it again, but this Time with UV22 Dithering
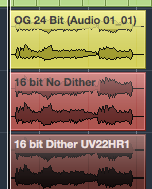
5) Add the Bounced Dithered Track to the DAW and Normalize Both, the Dithered and the Un-Dithered Track
Dither Types
- POW-r = Psycho Acoustically Optimised Wordlength Reduction (Originally Engineered by Dolby Labs, Weiss Engineering, Millennia Media and Z-Systems)
– Type 1 POW-r = for Loud Mixes with Low Dynamic Range, e.g. Highly Compressed Rock or Pop, Does Not use Noise Shaping, i.e. there is a Flat Frequency Response with No EQ Curve Making it Ideal for Bouncing to Hi-Res 24-Bit Files
- Type 2 POW-r = Typically for Speech, Simple Noise Shaping Curve with a Dip Around 2kHz and a Boost Above 14kHz to Help Vocals Remain Audible while Still Preventing Quantization Distortion
– Type 3 POW-r = for Highly Dynamic Recordings such as Orchestral Music or Film Scores, also Uses Noise Shaping but with a Much More Aggressive EQ Curve to Further Eliminate Quantization Distortion
HQ Dither Workflow
- Down to 16 Bit (from Any Higher Bit Depth)
- Dither Comes into Place when you Need Change the Bit Depth, e.g. Going from 32 Bit to 16 Bit
- it is Always Better to Sample Down and then Dither to 16bit Because the Sample Rate Conversion will be More Accurate on the Higher Bit Depth
- also Remember that Everytime you Load a Audio File into a 32Bit Float Environment and Tweak the Audio, you would Need to Apply Dither Again when Export Down to 24 Bit or 16 Bit Out of the 32Bit Float Environment
- You can Dither Either in Wavelab, Elevate, Limitless, Saracon, RX,
- it is Somehow Better Do Conversions Offline with the Best Converter you have (Probably Saracon)
2) Anyways, First Render the Mixed Project as 32Bit Float in 96Hz
- i.e. in the Original Settings the Project is Set at
3) Master the File and Render itat 32Bit Float in 96Hz
- i.e. Master in the Original Settings the File is Exported at
– Do EQ and Compression First when Mastering
4) Load File into Saracon and Downsample to 44.1kHz
- Leave it at 32Bit Float, i.e. Only Sample Rate Conversion
5) Load 44.1kHz / 32Bit Float Master Back into DAW, Limit and Dither it to 16Bit
- i.e. the Reason to Not Dither Right in Saracon is to Use Limiter Accordingly for the Final 16 Bit Version and Avoid Distortion
– you can also Use Elevate or Limitless which can Limit and Dither Right Away
CBR vs ABR vs VBR Bit Rate Modes
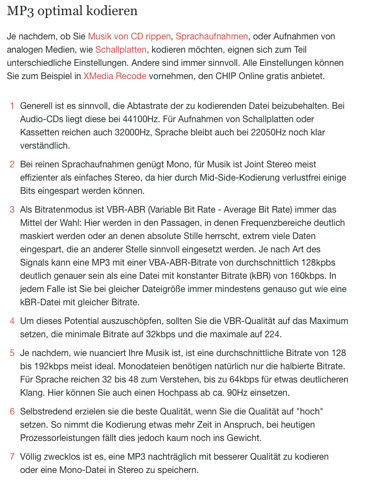
- CBR = Constant Bit Rate, Maintains a Steady Bit Rate Regardless of the Complexity of the Program Material, Lowest Quality but Predictable Final Size, but when Using CBR at 320kbps the Quality is Better than ABR or VBR
- ABR = Average Bit Rate, Varies Bit Rate Around Specified Target Bit Rate, at a Given Bit Rate Range VBR Provides Higher Quality than CBR
- VBR = Variable Bit Rate, Maintains a Constant Quality while Raising and Lowering the Bit Rate Depending Upon the Complexity of the Program Material, Final Size Less Predictable but Usually Higher Quality, i.e. at a Given Bit Rate Range VBR Provides Higher Quality than ABR
mp3 vs AAC
Leave a Reply