
General
- is a 360 Degree, Full Sphere Sound Recording Synthesis and Playback System
- Allows to Place Sounds in All Directions
- Including Above, Below and Behind You
- Relies on Meta-Audio Format and is Not Meant to be Listened to Directly
- Based on 4 Channels “W, X, Y, Z”
- Basically a “Sinus Sweep” was Recorded by 4 Handcrafted Ambisonic Microphones
W = Non-Directional Mono Component, Corresponding to the Output of an Omni Directional Microphone
X, Y, Z = Directional Components in 3 Dimensions (Think of it as “3D M/S” or “3D Blumlein Microphone Array”)
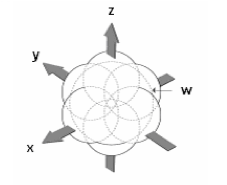
– it is Accurately Recording, Processing and Playing Back Sounds from Left/Right, Front/Back and Up/Down
– thus Creating the Aural or Sonic Impression of a Physical 3D Space
– the Real Magic of it that Any Audio Signal is Handled in “Ambisonics”
– i.e. Every Input Signal is Encoded to Format B to Guarantee the Perfect Match between an IR´s Original Position on Stage and the Instrument Assigned to it
- “Ambisonics” System also allows you to Interpolate Positioning Points Freely (i.e. you are Not Limited to those Spots that were used for IR Recording in the First Place)
- Experience the Full Soundsphere on Headphones via Your Personalised HRTF (Head Related Transfer Function)
- in Principle you can Playback Ambisonics on Almost Any Speaker Array, i.e. Re-Creating the Spherical Soundset at the Listening Spot, but you Need to Decode the 4 Channel Format for the Specific Speaker Array
- Remember a Big Advantage of Ambisonics is the Gapless Movement between Speakers (while Surround Jumps More between Speakers)
- Notice that the Placement of Sources in the 360° Array Plays a Big Role when Using a Standard Stereo System, i.e. Sources that are Aligned with the Direction of the Speaker are Louder (In-Phase) while Sources that are Not Aligned with the Direction of the Speaker are Lower or Even Cancel Out
– the Idea of a Binaural Headphones within an Ambisonics Setup is the Feeds are Sent to a Binaural Processor which Virtually Positions the Sources at the Direction that the Actual Speaker Would have been so the Immersive Spherical Soundset is Experienced Over Headphones
– Notice that Binaural Audio Material is Partly Distorted in the Frequency Response and Does Not Correspond to the Real Sound, i.e. it Comes from the Simulated Auditory Canal which Enables 3-Dimensional Hearing
1st Order Ambisonics
- also Called “B-Format” and Most Used Format with 4 Channels Representing Full 360°
- the 4 Channels are Called W, X, Y and Z
- Simplified (but Not Entirely Accurate) this Means:
W = Center
X = Left / Right
Y = Front / Back
Z = Up/Down
Mixing / Mastering Ambisonic
- to Preserve the Ambisonics 360° Air (i.e. Preserve a Natural Voice that is Not Compressed as a Radio Voice), You Should Not Apply Much Compression (if at All)
- i.e. Compression / EQ / etc. Should be Applied Before the Spatialisation (which is Luckily the Case in Cubase when Use DearVR as Panner)
- Mastering Rendered Ambisonic File has to be Different than Common Stereo File
- i.e. it is Advised to Not Use Multiband Compression / EQ / etc. During Mastering, thus Any of these Effects (Except Maybe a Limiter) Should be Applied Before the Spatialisation
Ambisonic Headphone Setup in Cubase
- 1) Go to Audio Connections, Add an “1st Order Ambisonics” Output in the Outputs Tab and Set it as the “Main Mix”
- Do Not Connect any Device Port here

2) Go to Control Room Tab, Add “Add Headphone” Input as the Headphone Output and Select the Audio Device
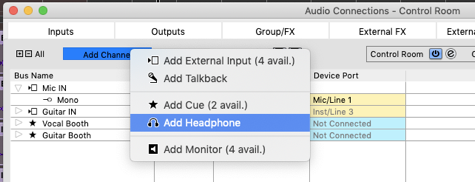

- You Now See the “Vst Ambi Decoder” Plugin on the Control Room Channel
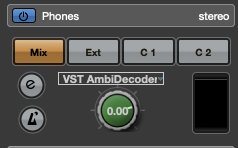
- Click the “E” to Edit the Vst Ambi Decoder Settings and Switch from Speakers to Headphones
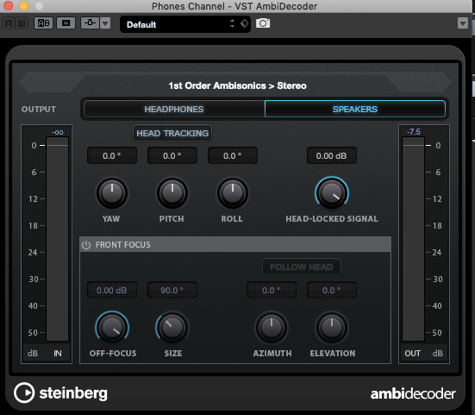
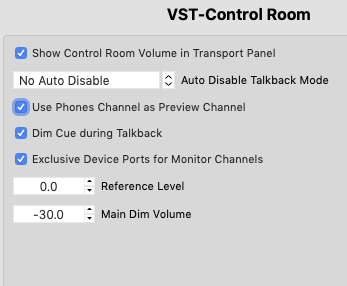
3) Go to Cubase Preferences “Vst Control Room” and Enable “Use Phones Channel as Preview Channel”

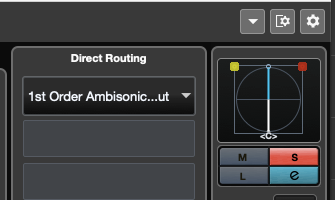
4) Create a New Audio Track or Vst Instrument and Select the “1st Order Ambisonics” as the Audio Output
– By Default you Get the “Vst Multi Panner” in Order to Place the Sound in All Directions
5) If you Work with Dear VR, Simply Right Click the Panner and Choose It


– Notice that you can also Save Presets from here Since it is a Vst Plugin Effect
6) Go to the Control Room and Press the “E” if you Want to Edit the Ambisonic Output

- by Default All is Set, i.e. the Ambisonic Sound is Converted to Stereo
- but if you have Immersive HRTF Profiles you can Connect them here

Ambisonic Stereo Speaker Setup in Cubase
- All Steps are the Same, but you Need to Switch to “Speakers” in the Ambi Decoder Settings

Leave a Reply