
Panning
- Do Not Confuse Panning & Balancing
- Takes Content of the Right Channel and Pans is Over to the Left Channel
- i.e. it Keeps Weight of the Content and “Re-Pans” it
- a True Stereo Panner has 2 Separate Left and Right Pan Knobs, thus is Able to Re-Position Either Left or Right Channel of a Stereo Source Independently
- e.g. if you Pan with a True Stereo Panner Both Signals to the Left, you have Both Channels Panned to the Left (Left then Plays a Perfect Mono Signal Out of a Stereo Signal)
Balancing
- Stereo Balance Panner has only 1 Knob and is How Pan Knobs Typically Behave on Stereo Content
- it Makes the Content of the Either Channel Quieter (Lose Weight) the More you Pan it Away to the Other Position as you Lose the Information of 1 Channel
- e.g. if you Pan with Stereo Balance Panner the Signal to the Left, you Only Get the Left Channel Out of the Speaker, thus the Right Signal is No More Present at All
- Balance Mode can be used to Narrow Stereo Image and Re-Position the New Constraint Together or Pan Both Channels Hard Left or Right to Sum to Mono (Summing to Mono this Way Increases the Level of course)
– with a Balance Panner you can Not Sum Left + Right to Mono (Only Either L or R)
DAW
- Panorama is Quasi the Whole Available Stereo Field, i.e. from Very Left to Very Right
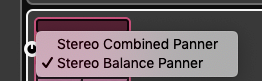
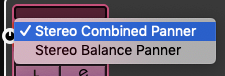
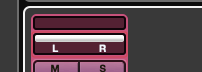
- in Modern DAWs there is Likely a Switch between a Pan and a Balance Option
- by Default the DAW is in “Balance Mode”

Panning Tricks
– Panning is very Important since we have Possibilities to Output in Stereo
– Imagine that the End Listener my have just One Speaker, a Stereo Set, a Stereo Set whit Speakers in a particular Way, Headphones or Earbuds (only Hard Left or Hard Right), Smartphone, Kitchen Radio etc.
– this is where Clever Panning comes into Place
5 Basic Ways To Pan
– to decide what “Panning Effect” should be achieved
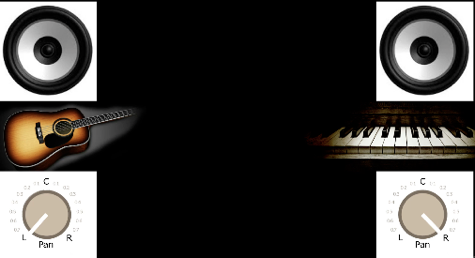
1) Pan One Signal Hard Left and the other Hard Right
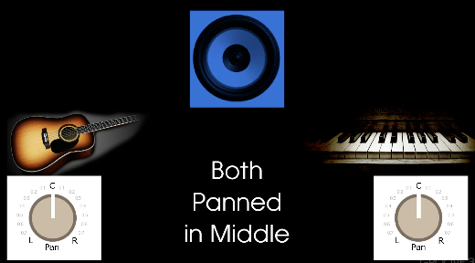
2) Pan Both Signals to the Middle
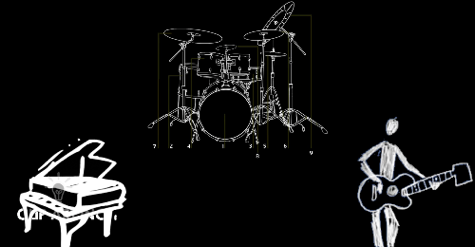
3) Pan Signals to Mimic a Room
– to distinctive Places as in a Live Set, where Piano Left, Drum Middle and Guitar Right
– basically Mimicking what’s happening in a Room
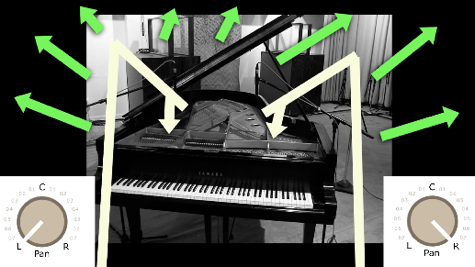
4) Give a Instrument the Feel of a Stereo Field
– for Example use 2 Microphones at different Positions when Record a Piano
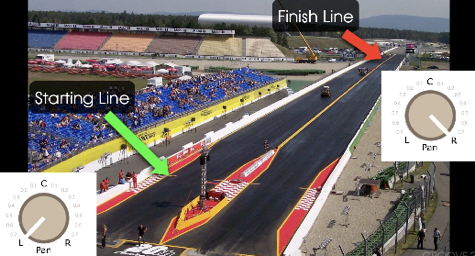
5) Place an Stereo Movement Effect on a Signal
– for Example Start a Signal from One Side and End on the other Side
Pan Laws
– when we Position the same Signal (Monaural Sound) to both Speakers to the Centre, this Creates the Illusion the Sound is coming direct from the Middle (even if we Do Not have a Centre Monitor)
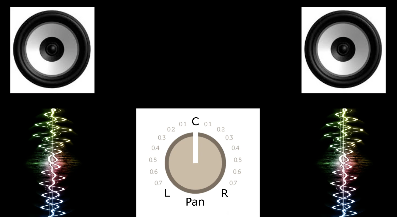
– the Downside of this Technique, if we Take a given Signal and Put it to 2 Speakers instead of 1, it Cuts the Signal going into each Speaker in Half, which is about a Drop of 6dB in Level in each Speaker
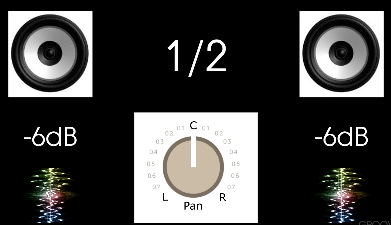
– in a Perfect Real World Environment you should Not Notice that Drop in Level (it should Combine to the same where 1/2+1/2=Whole again), but Room Ambience and Acoustics affects this Level
– means we Tend to Hear a Drop in Volume when we Pan to Middle vs Panning to One of the Speakers
– also when we move the Pan Knob from Hard Left to Hard Right, we wont Hear the Level Consistent throughout
– in other Words at the Centre Position the Sum of the 2 Channels Sounded Louder than if the Signal was Panned Hard Left or Right and it became Common to Use Logarithmic Gain Change Response to Drop Signal by -3dB RMS at the Centre
– this is Why any DAW gives you the Option to Compensate by Increasing the Volume a bit as the Signal is Panned to the Middle (mostly by default on -3dB instead of a Natural Decrease by -6dB)
– in Cubase you Adjust that per Project in “Project Pan Law”

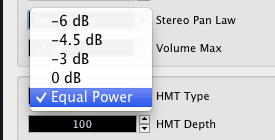
– to Test the Project Pan Law simply Switch a Mono Sound (via Tone Generator) to either Side and Look at the Level Meter, then Switch to Centre and Look at the Difference
– Notice that Project Pan Law Compensation affects only Signals anything other than Hard Left or Hard Right (means the Level Hard Left or Right is Consistent and only Signals but that get the Compensated Volume)
– the Project Pan Law Setting must be Defined before Mixing or it will Affect the Mix if you Change it afterwards from say -3dB to -6dB (may Clip)
– the same if you Bring a Project to a different DAW, make sure to Set Pan Law to the same in Target DAW
Frequency & Sound Localisation
– Localisation is the Process of Determining the Location of a Sound-source
– the Brain utilises settle Differences in Intensity, Spectral and Timing Cues for Localisation
– Frequencies Play a Big Role on that, for Example Hi Frequency Content Panned to a Side is much more Effect-full than Lo Frequency Content
– so where exactly you Pan High Frequency Content has a Big Impact on the Overall Sound, even in Small Increments (Not necessarily Hard Left or Right but by -32 or +12 etc.)
– Pad or Melody Type of Sound, even with Bright Content a Panning is barely Noticeable
– but Content with Attack and Richer Transients even with lot of Lo Content the Panning has a bigger Impact
– you can Check the Impact of Panning by moving a Low / Hi Shelf EQ through Content parallel to Panning and Check the Overall Effect (means as the Shelf Cuts away Highs, a Panning has Less Impact)
Panning FX
– you can choose several Techniques to Modify Position in Stereo Field
Automation
– simply Draw Curves in the Standard Pan of a Track
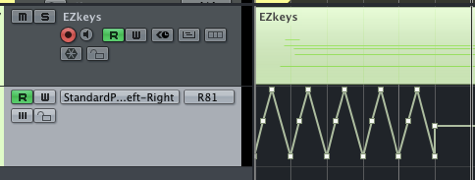
– choose different Shapes for different Effects
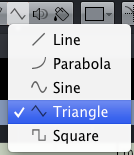
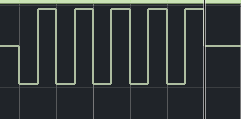
– a Square Wave for Example Sets Pan to either Left or Right with No Mids (whereas Sine or Triangle Wave slowly moves from Left to Right)
Plugins
– Auto Pan, Pan Man etc.
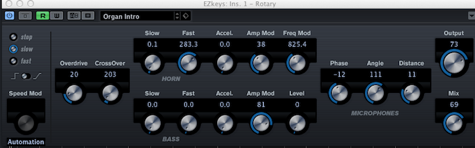
Leslie Effect
– the affects also Pitch and EQ
– a Bass Speaker and Treble Speaker are separated with a Crossover
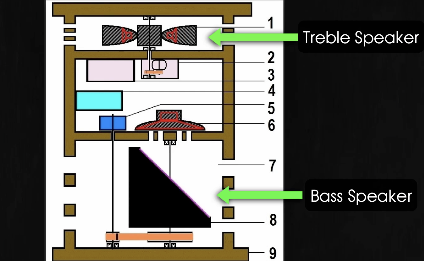
– the Horns actually Spin around and Create a Special Stereo Effect
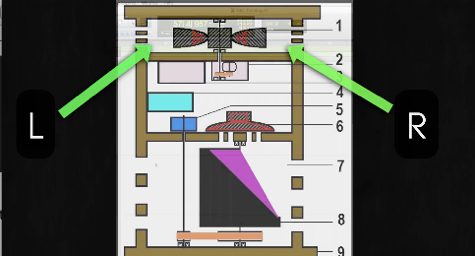
– Cubase “Rotary” is such an Effect
Creating Stereo & Doubles (from Mono Sources)
– you can Create a Stereo Image from a Mono Signal with Phase, Convex Filter, Timing or Delay Effects
Phase
– by simply Doubling the Phase and Shift one of the Phases against the other, you can make a Signal to appear very Wide
– the Downside is, if you Output the New Signal in Mono it will Sound very Phased
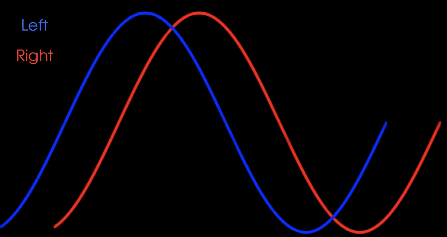
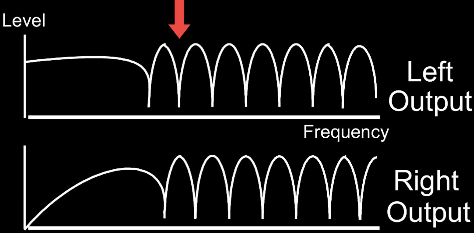
Convex Filter
– also Doubles the Signal and then Boosts Left while Tales Back Right at the same Time (goes Back and Forth over Time)
– Not as Wide as a Phase Effect but Introduces No Problem if you Convert Back to Mono as it will be putted Back to “Normal” again (No Phasing at all)
– more used for Bass Sounds
Delay / Timing Effect
– either you Double the Whole Mono Track and Shift the Copy in Time a bit in Arrange which makes a Signal to appear No more in the Mids
– or without a Doubled Track but Insert a Delay with just a Small Values in Delay (about 12ms)
– in Delay Type of Stereo Enhancement, we can Add Modulation on Top for Chorus, Flange or Vibrato Type of Sounds
– good for Mono Guitar or Synths
Stereo FX
– you can further Create Stereo FX with Reverb, Delay
Reverb
– Notice that with a Mono Source you actually Insert or Send a Stereo Reverb as “Mono to Stereo”, so the Send itself stays Mono but the Reverb Effect Plugin itself Outputs Stereo
– but you need to know that if you Pan the Source to either One of the Sides in a “Mono to Stereo” Chain, the Source comes only from either one of the Sides but the Reverb is Stereo
– so all you have to Do then is to Make it “True Stereo” by Setting the Source to Stereo and Insert or Send the Reverb as Stereo as well, then a Panned Source and Reverb will occur at specific Location
Delay
– same Reverb “Mono to Stereo” Principles apply to the Insertion of a Delay Effect, means if you Send a Mono Source to a Stereo Delay the Effect is Stereo but the Sound itself is Still Mono (True Stereo only if Source is Stereo and Insert / Send to a Stereo Delay)
– Delay can be used as Doubling Effect (about 12ms), Slap Back Echo Effect (about 180ms), Time Effect (1/2, 1/4, 1/8 etc.) or Ping Pong Effect (Repetitions appear Hard Left / Right)
LCR Mixing
– this Technique Originates Back to the First Days in Stereo Mixing when there way No “Pan Knob”
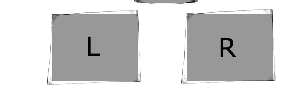
– Back then you only had 2 Buttons Labeled L, R, One for Left and One for Right
– Push the “L” Button Down, makes the Sound appear Only on Left Side
– Push the “R” Button Down, makes the Sound appear Only on Right Side
– Push both Buttons “L+R” Down, makes the Sound appear Only on Centre
– if you would wanna have anything else, you would use an Extra “Pan Knob”, that let’s you Place a Signal anywhere in the Stereo Field
– but Engineers did Not liked Panning just a bit due to the Drop of Volume (Pan Law), plus that a Sound via an Extra Pan Knob was going through an Extra Level of Electronics
– so LCR Mixing is really only Hard Left, Hard Right or Centred for the Purist and Ensures also Mono Compatibility
Leave a Reply