
1) First Make Notes of How you want to Stack All Tracks
- i.e. Priorities, Divide Tracks into Low / Mid / High Frequency Spectrum
2) Clean Up Low and High Frequency Content from Tracks that Don’t Need Them
- e.g. Low Cut Guitars, Keyboards, Vocals at Around 100Hz to 150Hz with a 12dB Slope
- i.e. Cut at the Point Where It Loses Energy and Dial Back a Bit
- High Cut also Tracks with Too Much High Frequency Content, e.g. High Cut Guitars at Around 5500Hz with a 12db Slope
- Try Resonant Cuts, i.e. Boost a Bit at the Cutoff Frequency
3) Sidechain Tracks that Use a Very Similar Frequency Spectrum Against Each Other (e.g. with Trackspacer, DSEQ, Multiplicity)
- i.e. Tracks that Play a Key Role in the Song
4) Clean Midrange by Listen Through an EQ (e.g. ADPTR) that Only has Midrange from 200Hz to 6000Hz Frequencies Enabled (also Use a Midrange Speaker Such as Avantone / Auratone)
- this will Unveil the Midrange and Hopefully Make the Midrange as Appealing as the Low and High Range
- Turn Down Too Loud Instruments by a Couple of dB
- Push Up Too Quiet Instruments by a Couple of dB
- Then Use EQ per Track to Clean Up Overall Midrange
- you can Repeat this Procedure for the Lows and Highs as Well, i.e. Make the EQ so you Only Hear Highs and Cleans Those Up and then the Lows
5) Use Auto Pan Options for Certain Tracks to Free Up Space
- i.e. a Good Idea is to Use a Mono Recording or Mono Down a Sub Ideal Stereo Track and then Use Auto Pan
- Use the 50% (50 Panned) or100% (100 Panned) Marks etc. in Auto Pan to Set the Overall Width in the Stereo Field
- Use Rather Slow Movement to Not Distract the Listener
6) Use Pre Delay to Separate Reverb from the Original Source and Create Distance / Larger Sound
- Listen for the Groove when Setup the Pre Delay, Mostly Below 100ms
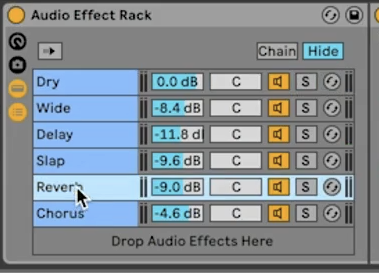
7) Create a FX Send and Stack Effects for a Multi FX
- i.e. Leave the Original Signal Intact but Send it Through Custom Chain for an Additive Process (Not Insert)
8) Add Distortion to Drums
9) Use Bus Processing to Shape Overall Picture and Create More Depth
- e.g. Group Guitar Tracks and Add a Simple Channel Strip (e.g. AO Brit Channel) and a Glue Compressor
8) Clear Up Any Reverb Sound
- Use a Low Cut at Around 230Hz
- Use a High Cut at Around 5000-6000Hz, i.e. to Keep Away the Sizzle
- Add a De-Esser to Cut Out Resonances Brought Out by the Reverb (or Put De-Esser Before Reverb), i.e. Put De-Esser in the Send Path (Not Insert)
- Put a Compressor After the Reverb to Dense Up the Reverb and Make it Fit with the Original Dry Vocal
- Finally SC Compress the Vocal Reverb (or Main Instrument), i.e. so the Reverb Only Appears when there is No Vocal, Use a Very Fast Clean Compressor with the Attack and Release Set to Zero (Fastest Option)
9) Don’t Forget Using Chorus, Phaser or Flanger to Spread Mono Sources and / or Make Sound More Lively (Flanger can also Serve a Drum Set)
Leave a Reply