
- A Great Trick Instead Solo or Boost a Band is to Judge by the Absence of a Frequency, e.g. Reduce a Band by 10dB with a Bell and Q of Around 4, Start with 100Hz / 500Hz / 2kHz / 5kHz, then 50Hz / 200Hz / 1kHz / 3kHz, i.e. Listen if You Miss the Frequency or if it is Even Better (Again, Judge by the Absence of a Frequency)
- Limiter = has 1 Main Function that is to Prevent Signal from Going Over Defined Loudness by Chopping Off the Transients, Clipper = Does the Same but Instead Chopping Off the Transients it Bends / Saturated the Transients
– Set Timing Release on Compressor Carefully to Support Tempo and Pump of the Music / Rhythm
- Do Saturation on Busses Instead Individual Channels, i.e. the Effect of Applying Saturation to Multiple Layers Saturates / Glues the Overpowering Resonances of the Multiple Layers Together
- Prevent Saturation on Sustained Sounds, Especially Lower Sustained as the Saturation Leads to Un Musical Results (Ever Going Saturation), i.e. Better Saturate Transients and Short Decayed Sounds to Separate Transients vs Sustains and Keep Them Clean
- Either Saturate or Compresses, but Not Necessarily Both as Saturation is Quasi a Compression Since More Harmonics are Generated
- Take Away 4dB with Q of 4 at Around 4kHz on 808 / 909 Hats (or Rides), Generally from 3kHz to 4kHz, this Helps to Put Focus on Other Instruments by Removing the Constant Ringing Resonances from the 808 / 909 Character
- Remember that for Vinyl the Bass was Cut at 40Hz or 50Hz plus the Bass was Mono In Phase at the Lowest Region, the Sides are Cut between 150Hz to 300Hz (by Neumann Vinyl Cutting Machine Elliptical EQ)
– Majority of High Frequencies in the Kick and Bass Occur with Roughly the First 50ms
- Remember that a Single Band Saturator Creates Harmonics Based on the Fundamental / Loudest Note, but a Multiband Saturator Does Not Automatically Carry Over that Lowest Fundamental Peak / Loudest Note on the Second Band Split Crossover, i.e. the Second Band Split Measures the Fundamental from What it Finds in Its Band Split which May be Not a Multiple of the Root (it Measure and Saturate Based on an Inharmonic Peak), therefore Set the Band Split(s) Crossover Always Logical so they Support / Start from a Fundamental that Supports the Song
– Remember the Lowest 2 Octaves are Around 50Hz and Around 100Hz, this is a Very Narrow Range to Fix Things (i.e. if you Look at 1000Hz and 2000Hz those to Higher 2 Octaves have Much More Space in Between)
– Regarding “Making a Kick Cut Through” It is All About the Sum of All Parts, also the Kick will be Perceived Relative to Every Other Instrument or Audio Source in the Mix, Again Do Not Focus on just a Single Element (you Need to Consider Absolutely Everything), e.g. if there is Any Other Instrument that has Energy in the 50Hz to 300Hz Range (and in the 2kHz to 10kHz Where the Click can be Found) and those Instruments Messing with the Phase of the Kick Transient the Kick will Feel Weaker (No Matter What Processing you Do to the Kick)
- for Kick and Snare, Send to Room / Plate / Tiled Room (Lexicon), i.e. Send Kick to All 3 with Tiny Amounts with Most Send Amount to Tiled Room (Lexicon), Snare Top is Dry but Snare Bottom Same (Similar) as Kick, Overheads / Room Mics / Toms to Room and Plate Only
- when Tuning Vocals, Start with Note Transition and then Speed, Once Each is Set you can Use the “Link” Option to Adjust Both on Relation
– also when Tuning Vocals, Always Tune at the Beginning of the Chain because Auto Tuning has a Sound / Introduces Artefacts / Changes the Frequency Spectrum, i.e. so you Want to Process with EQ / Compression etc. After the Tuning, the Best is to Print the Auto Tuned Stage to Commit these Vocals as the Fundament and then Start to Process with EQ / Compression etc.
- also when Tuning Vocals, Tune Every Single Vocal Track on Itself and Not the Vocal Sum, i.e. Overlapped Vocals have of Course Overlapped Variations and Tuning will Never Work Properly
- Disadvantage when Mixing via Headphones is Especially, Tiring in the Long Run / Weaker Interpretation of Stereo Image (No Crosstalk) / Panning Sounds More Extreme / Reverb + Delay May Sound Louder on Headphone (which Means You can Boost Reverb + Delay a Bit More on Headphone) / Overall Less Translatable to Other Mediums (Especially when Using Only 1 Headphone)
- To Test a EQ Plugin, Try 60Hz Boost / 200Hz Dip / 5kHz Boost / 8kHz or 9kHz Shelf Boost, as Those Spots are Often Used in Mastering
– If you have a Weak Spot in the Spectrum, Boost it Narrow with a Digital EQ Quite a Bit and then Insert a Saturator / Distortion Tool to Generate Harmonics Over the Weak Spot, Finally Copy the Same Digital EQ After the Saturator / Distortion but this Time Decrease Level Until it Fits (i.e. Narrow EQ Boost at 2kHz then Saturate then Narrow EQ Dip at 2kHz)
– Pre Amp API = Modern / Aggressive, Neve = Warm / Retro 70 / Telefunken = Smooth / Creamy 60
- Rain Fall Covers All Frequencies and is Equal to White Noise
– Hardware Transformer Deals with Impedance Matching, Color Signal, Reduce Noise, Saturate Audio
- Tips to Compress Snares (or Kick) : Try 1176 on Acoustic Snares Because of the Slamming of the Attack on Fast Transients, VCA for Snap, DBX 160, Klanghelm MJUC MKIII (Compression and Saturation), Clip Before Compression, Transient Designer on Track and then into Bus Clipper and API Style Bus Compression, Bit Crusher at 8 Hz with 8 Bits, for Modern Snares a Distressor, for Rock/Metal a Longer Attack to Let Transients Through and a Clipper Rather After Compression (at the End of the Chain)
- In General Use a VCA Compressor Before a Tube Compressor in Order to Control Dynamics First Before Applying Color / Character (Although you can also Use a Tube Compressor First to Enrich the Sound Before Controlling Dynamics Further)
– There is No Musical Information Above 4kHz, i.e. Above 4kHz You have Overtones / Hi Hats / Noise / Sibilants etc. but No Fundamental Nor Harmonic Information, Even the Highest Note on a Violin is 4kHz, Similar Below 200Hz you have Thump of the Music but No Recognizable Musical Information, thus that is Why the Midrange is so Important and Records Live in the Midrange
– DC Offset Occurs at -144dB and can be Removed with Certain EQs that have a Low Cut which Goes that to -144dB
– when Formant Shifting (which Should be Done After Vocal Tune) Do EQ Before by Low Cut Until Desired Fundamental, Control or Cut Out Sibilances and also Control / Clip Gain Aggressive Vocal Transients
– the Reason 2 Digital EQ with the Same Curve can Sound Different is Simply Noise and Distortion
– a Good Gain Staging for Plugins is to Peak with Percussive Sounds at -6dBFS (or Around 0 on VU Meter) and Sustained Sounds between -12dBFS to -18dBFS (or Around -15 on VU Meter), and Once Balance is Set for All the Main Output Should Not Peak More than -6dB to -12dBFS so you have Enough Headroom for Buss Treatments and Master
- Sweet Spot of Ratio in a DBX Compressor Unit is Usually 4:1
- when Mix / Master Over HP the SPL Level should be Max 85dB SPL (Use A Weighting / Fast Response) for Accurate Decisions, but Listen Below that when Working Multiple Hours, i.e. 75 to 80 at Most (or even Lower):
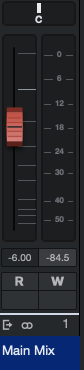
- DAW Output is Around -8.5 Integrated (Set Main Mix Output to -6)

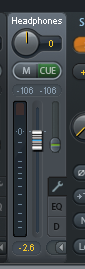
- RME HP is Around -2.6
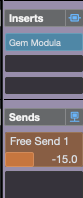
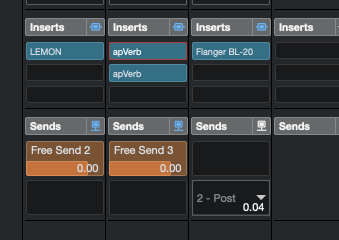
– for a Clearmountain Vocal FX Chain Insert the Yamaha Symphonic (Insert Plugin) -> Send to 1/4 Delay -> Backward Verb Only Over the 1/4 Delay -> then a Flanger Only Over the Backward Verb
Leave a Reply