
- Pre-Step 1 Revox Tape Saturation (Optionally)
- Pre-Step 2 Prepare Files (Optionally)
- Step 1 Reference Track Setup
- Step 2 Creative Surgical EQ
- Step 3 Tonal / Color EQ
- Step 4 Stereo Image
- Step 5 Distortion /Harmonics
- Step 6 Multiband Compression / Limiter M/S Mode
- Step 7 Transient
- Step 8 Final Mid / Side EQ
- Step 9 De-Esser / Transient Control
- Step 10 Reverb
- Step 11 Final True Peak Limiter
- Step 13 EBU / Streaming Mp3
Pre-Step 1 Revox Tape Saturation (Optionally)
– Use Real Revox Tape Machine Saturation to give the Mix a Low Frequency Glue and Soften the High End
– i.e. Mimic What the Tape Machine Did in the old Days, Shape Bottom and Top, Add Saturation, Increase Perceived Loudness
– Bias is an “Inaudible” High Frequency Signal applied to Magnetic Tape during Recording during Recording to improve Signal Quality by Aligning the Magnetic Particles
Pre-Step 2 Prepare Files (Optionally)
Pre Clean Up
– Do “Pre-Cleaning” Plugins per Clip in Montage / Effects or Clean Up and Pre-Render Out from in RX
– Eliminate Noise in the Mix, i.e. as the Master will Make Details to be Heard Louder it will Definitely Increase Unwanted Noise Level as well
– Reduce Frequency Build Ups in a Mix that are Not the Main Focus of the Song , i.e. Leave the Mix Dynamic (before Mastering)
– be sure to Remove any Unwanted Noise, Clicks etc. in the Mix, you will definitely Hear those Imperfections when Mastering (which can make a Track unusable)
– i.e. De-Crackle, Ce-Clip etc) De-Verb, Unfilter, Comb and Build up Removal, Remove DC Offset
Set Level of Audio Files for Mastering
– the Mix Should have its Highest Peak between -12dBFS and -3dBFS (better -12dBFS to -6dBFS)
– i.e. Increase / Decrease the Gain of the Individual Mixes in Wavelab so they Peak in that Range and Not Higher
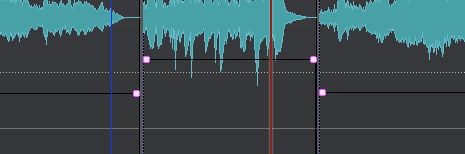

Step 1 Reference Track Setup
– Before the Main Audio Mastering, Calibrate the Mix-Downs Level to a Commercial Level via a Reference Track
– this Prevents you from Changing the Picture Completely with a Big Loudness Change
V1 Reference Track Setup Via Simple Gain
1) Insert Levels or Master Check (First Instance in Playback Processing)
2) Then Insert Magic A/B and Load a Reference that Matches the Mixing Character
– In this Order any Other Metering/Analyzer Software will be Able to Measure Montage Tracks, as well as the Magic A/B References
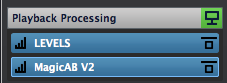
4) Now simply Decrease the Reference Track´s Level with Magic A/B to the Integrated LUFS Value of the Your Track
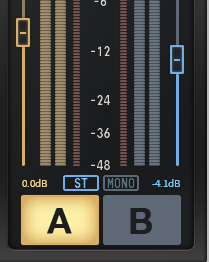

V2 Reference Track Setup Via Limiter
1) Load a Reference Track, i.e. a Finished Mastering Track in the Style of your Track into DAW (Magic A/B) or Ozone Standalone Slot
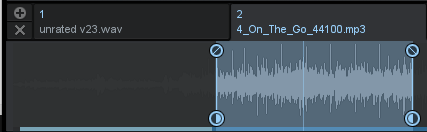
2) Search the Peak Level of the Loudest Section of the Reference Track which is the Number to Enter in the Output Ceiling Level of the Ozone Maximizer
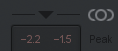
– i.e. Look at the Input Peak Level of the Reference Track, which in this Case is around -2.2 for the Left Channel and -1.5 for the Right Channel
3) Adjust the Ceiling of the Maximizer with the given Result from Step 2 to around -1.8 dB (Average of L vs R)
– this will Limit your Track to Never go Above that Level
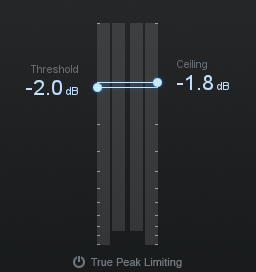
4) Finally Adjust the Limiter “Threshold” of Your Track, so you get the roughly the same RMS Level as the Reference Track
– e.g. the Reference has a RMS Level of around -14.3dB (on the Left) and -15.4dB (on the Right)

– so Start Limiting until your Track is in the Ball Park of +/- 14dB

– in this Case a Threshold of -13dB was needed
– make sure to choose the Optimal Ozone where IRC III or IV are the Best (Transient or Classic)
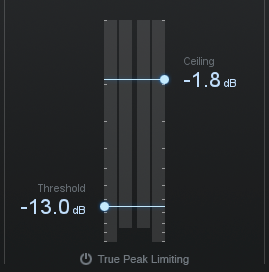
– Reference Level Matching is Done
Step 2 Creative Surgical EQ
– First EQ Adjustments, mainly as a Reductive EQ and First Mid/Side Corrections (we Master “Mid/Side” Definitive with the Stereo Imager Module Later in the Chain)
– Linear Phase EQ Mode is Recommended
– Remove “Most Annoying” Sounds
– Remove Lows of the Sides, from 0 to 400Hz (depending on the Track)
– Create a Bump on Mids at around 400Hz – 600Hz (depending on the Track)
– Check the Very Low Subs in Mid and Side
General Approach
1) Boost 15dB with a Q of 7
2) Sweep through the Material with Frequency Knob from Top to Bottom
3) Search the “Most Annoying” Sounds, but take care to not Cut the “Nice” Character of the Material
4) Narrow Q to 44 to then Find the Centre Frequency of Problem
5) Finally Adjust the Q to only affect the Most Annoying Frequency Zone
6) Reduce Gain just as much as needed
7) Compare
Step 3 Tonal / Color EQ
– the Benefit of “Fixed” Frequency Shapes as in Analog EQ´s can be Helpful instead of the Less Audible “Continuous” Digital EQ Approach
– i.e. this can be used as the “Additive EQ” since Pultec Styled EQ´s can be Pushed Quiet a Bit
– Make Very Subtle Global Post EQ “Finishing Adjustment” with a Transparent EQ
– as the “Mix-Down” Must Deliver Definitive Contours and the Pre EQ has already Small Changes, this Post EQ Adjustment almost “Does Not Exist”
– often a little (Narrow) Boost on the Low Body at around 40-100Hz and (Broader) High Boost at around 3-4 kHz
Step 4 Stereo Image
– Enhance / Spread / Place Stereo Image
Step 5 Distortion /Harmonics
– especially the Mid and High Range Benefits
– Tube / Tape are often the Best Sounding
Step 6 Multiband Compression / Limiter M/S Mode
– Master Compression 2:1, Slower Attacks such 10ms, Longer Release such as 60ms
– EQ with 1 to 3 dB (Larger Amounts of EQ-ing indicate that there´s something wrong with the Mix)
– MB to usually you Limit/Compress Bass and Mid
– i.e. Control Low Frequencies and Make the Sound Image more Compact
– a Ratio between 1:5 to 2:1 in Mastering is Common
– Fast Attack = when Material is a Mess in Terms of Lots of Different Dynamics (e.g. Lots of Percussion etc.)
– Slower Attacks like 10ms or so to Preserve Transients
– Slow Attack = More Punch but Less Initial Dynamic Control (e.g. Bass Drum will Not be Controlled)
– Longer Release Time like 60ms or so to Avoid “Pumping Effects”
What the Multiband Master Should Do
1) Enhance Boom (20-150)
2) Get Rid of Energy in the Muddy Area (150 – 500)
3) Tame the Medium a Bit (500 – 2000)
4) Add Shine on Top by either Expanding, or Compressing & Raising the Upper Mid and High-End (2000 – 20000)
Step 7 Transient
– Add Some Clarity by Either Reducing or Boosting Attack / Sustain
Step 8 Final Mid / Side EQ
– Final Clean Up of Mid / Side
Step 9 De-Esser / Transient Control
– DynamicControl Nasty Frequencies
Step 10 Reverb
– Reverb can be useful if Not enough Reverb is Present in the Mix Down
– or use Reverb to Enhance Mid /Side Experience, e.g. add only Reverb to Lead Sounds while Leaving the Background Intact
– or simply to “Sweeten” the Whole Mix
– a Plate Reverb can be useful as it Does Not Really Create Distance (MAT Plate for the whole Mix Down??)
– anyways, a Nice Sheen and Sort of “Mid Range Gloss” is what you can get which you should Miss when Bypass Reverb
– use Reverbs Internal Low-Pass (8000Hz) / High-Pass (800Hz)
– use Reverb Just for a “Invisible” Small Room (Studio and Live Room Presets)
– Help to Shape Tone and Feel of the Music Organically
Reverb Recommendations
a) Width = Narrow
b) Out Frequency to Taste
c) Mix between 1% to 10%
d) Fine Tune if Necessary
Step 11 Final True Peak Limiter
– Settings of -2dB to – 3dB are often Enough (until -6dB a Transparent Limiting is still Possible)
– IRC III & IV Preserve Transients and allow for Distortion-Free Limiting
Step >>> 12 Dither
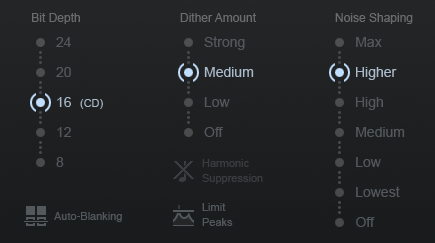
a) Use Loudest Part of the Song
b) Set the Output Ceiling in Limiter to to the Streaming Target
c) See the Peaks you get and Make sure that Hot Peaks are just a Few Exceptions (e.g. -1.3dB should only be Occasionally)
d) Increase Limiter so the Transients Hit the Max Output Volume without Distorting
e) Also Check the Dynamic Range of Material as you Increase Limiter, go for DR of 12 (Range of 10 – 14)
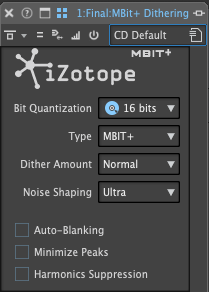
– in WL, the Ideal Dither Setting According to iZotope is Below (i.e. iZotope Recommends this for All Purposes and if you Do an Exception you Really Should Know What you are Doing)
Step 13 EBU / Streaming Mp3
Match EBU Loudness Normalisation
– the Best Practice is to Already Mix the Tracks to Be Around “-16 LKFS”, so the Music Services Do Not have to Turn Up or Down your Music to their Preferred Target Loudness (which is usually “-16 LKFS”)
– when you Convert to Mp3 Make sure that the Audio is Not Going Above -3dBTP
– when you Convert to AAC Make sure that the Audio is Not Going Above -1dBTP
– as a Test you can Insert Nugen Master Meter, then Nugen ISL TP Limiter and Finally another Instance of Nugen Master Meter to Monitor Level after the Limiter
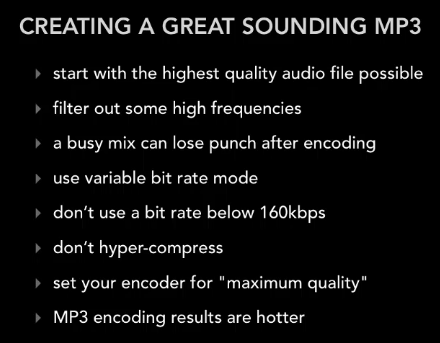
Mp3 Considerations
Leave a Reply