
– When 2 Different Sources Suppose to be Played at a Similar Level, Record Them Differently but Never Just Lower the One of Them in Volume as the Lowered Sound Unnatural Bright, i.e. a Harder Hit Tom for Example has a Louder Attack and Midrange, this Applies to Almost All Sounds (e.g. Guitar etc.)
- Do You Mix for the Trees or for the Forest?, Avoid Mix Tracks in Solo and Adjust in the Context
- if you Pan Hard Left / Right and the Parts Still Do Not Stick Out as Desired, Use EQ on Both Sides and Do Different (Counter) Settings on Each, e.g. Boost High Shelf Left but Reduce High Shelf Right, or Peak Left at 1.6kHz and Peak Right at 3.2kHz, if Guitars then HP Both at 180Hz so Drum and Bass have All the Room to Breathe
– What is Often Mentioned as Dimension in Sound, is Usually a Slight Variation of the Stereo Field, or Just Running the Device in Dual Mono
– Analog Equipment can have from 5% to 20% Tolerance in the Frequency Response, i.e. Differences from Unit to Unit or Channel to Channel etc.
– Play the Bass Along if you Shape the Drums, i.e. Compress / Expand / EQ the Drums and have the Bass Playing in Order to Best Mix 2 of the Mosts Important Elements in Context
– Remember, in the Analog Domain Things were Recorded to Tape which has a Low Dynamic Range while Digital Domain has a Huge Dynamic Range, thus to Capture that More Even Analog Sound is to Mimic that Tape Compression, i.e. Mimic the Effect of Analog Domain Units Started to Distort / Compress the Peaks when the Input was to High
– A Good Trick to Clean Up the Highs is by a) Controlling the Attack / Sustain but also Width in the Highs, b) then Add a Spectrum Cleaner Like Soothe / Spec Craft etc. to Dynamically Control Only on the High End Portion, c) Finally Add Some Tape Saturation Only on the High End to Compensate, you can also Do Such Things in Parallel but then Always Use a Linear Phase (i.e. a) Send Vocal to Parallel Where there is a Linear Phase EQ with Only High Freq Isolated, Put a Compressor After the EQ and Compress Heavily, c) Then Raise the Parallel Send to Your Like)
– It is a Good Trick to Low Cut a Guitar (or Something Else) Different for the Left and Right Channel (or Mid vs Side), e.g. Low Cut the Guitar More on the Mid (or Left when Guitar is Panned to the Left) to Avoid the Guitar Low End Clashing with the Bass Low End when Summed, also Low Cut Less on the Sides Allows to Make the Hard Panned Guitar Sound Thicker on the Side when Listened in Stereo and when Collapsed to Mono the Hard Left Signal is Quieter so it will Not Disturb the Bass that Much Anyway
– Use the Older Reverbs (Such as 224 or 480) to Thicken the Timbre or Reinforce the Element or Add Drama, Use Bricasti to Place the Reverb Behind the Source, Use Modern Reverbs for Precision and Realism
- a Hard Panned Signal Needs More Reverb than a Centered Signal, e.g. 3 Different Guitar Parts Playing Different Motifs, the Centered Guitar has Only a Stereo 1/8 Delay while the 2 Hard Panned Guitars have Quite Strong Stereo Reverbs (i.e. Reverbs are Stereo and Not Panned)
– Flanger / Phaser / Auto Pan / Pitch / and Other Modulation Effects Came with the First Available Digital Delays, Such as Eventide Harmonizer, i.e. Before the Only Way to Do Similar Things was via a Tape Machine (Except for Long Delays which Could Not be Produced Back then Because there is No Tape Machine that had a Long Enough Gap (40cm to 50cm) between Record Head and Replay Head
– Rudy Van Gelder = when Stereo Came he Decided to Place the Individual Instruments as if they were Placed in the Room (e.g. Trumpet Player on the Left, Guitar on the Right)
- Feedback Type Compressor = Signal Goes Through the Whole Gain Reduction Chain and then the Needed Amount of Gain Reduction Calculated and Sent Back to the Gain Reduction Circuit
– 2kHz and 4kHz are Frequencies we are Very Sensitive, so Could be Spots You Use a Resonance Suppression Tool, but Use Resonance Suppression Tools Within a Range (e.g. 2kHz to 4kHz), in General More in the High Range to Fix Harshness
– Regarding Oversampling, be Careful Because Once you Turn On Oversampling the Sound is Different (Thins the Sound Out Because the Reflected Signals are Not there Anymore), i.e. Either You Start Right from the Beginning with Oversampling or Trust What you Hear (or You have to Probably Re-Adjust Everything if you Activate Oversampling in the End)
- Make Use of A / B Settings Wherever Possible, i.e. You Dial In 2 Subtle but Different Settings and then Compare via A / B (e.g. 2 Different Reverb Settings)
– Motorcity EQ (Passive) has Fixed Frequencies at 50 / 130 / 320 / 800 /2000 / 5000 / 12500
- Stick with the Moves you Got, i.e. if the Result is Not there Yet Do Not Go Backwards and Change Previous Moves that you Trusted, Instead Call Another Tool and Correct the Spot, e.g. you have EQed a Vocal with a 3 Band EQ by Reducing a Little at 300Hz / Pushing a Little at 1.6kHz / Reducing a Little at 3 kHz but the Result is Not Fully Satisfying (as Its Missing Bite), then Add Bite with Another EQ by Increasing 2.5kHz or 3.2kHz a Little (Instead Changing the Decisions Made with the 3 Band EQ)
- Attack Shapes the Punch / Attitude of a Sound / Front Edge of a Sound, Defines Brightness
- Get Away from Sweeping Around the EQ Until you “Got It”, Learn to Know in Advance What you Need to Fix, i.e. Say “I Need a Cut at 180Hz by 5dB” and Do It (if the Results are Very False, You Start to Learn It for the Next Time)
- If you can’t Get a Element Mixed in a Song (e.g. Bass or Vocal) to your Satisfaction, Mute It for Now and Continue Mixing the Rest and then Come Back to the Problematic Element
- Song Transitions Should Appear in Pairs, i.e. 2 Old Things Go and 2 New Things Come
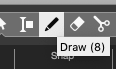
- to Remove Really Harsh Sibilances etc. Use the “Draw” Tool in Cubase and Lower the Volume at Exactly those Spots (Start with About 6dB Attenuation), i.e. De-Esser or Auto-Tools etc. will Likely also Remove Important Information and Sibilances are Very Important to Preserve Clarity
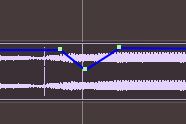
- Automate Drum Fills for More Dramatic Effects
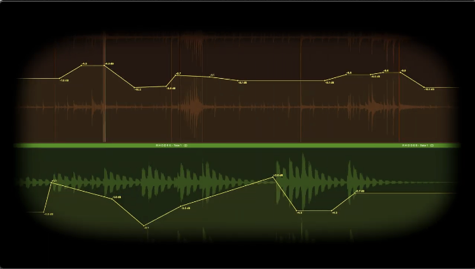
- George Massenburg is a Fan of Sweeping in Cut Mode to Find the Un Beautiful Sound (Instead Sweeping in Boost Mode), i.e. Do the Right Cut at the Right Spot, Sweeping in Cut Mode Sounds Like a Phaser and Unveils the Edges of the Filters
– OTT Compression is Great on Basses
Leave a Reply